Check contents of box to be sure you have all necessary equipment:
- Scanner (data collection device)
- Battery
- Cradle
- Serial to USB Cable
- Power Cord
- Holster
Installation Procedures:
- Insert the battery into the data collection device.
- Power on the device.
- You will see a screen that looks like the picture below:

- Notice the bottom row lists the date, time, collection count, and battery level.
- Check to be sure battery level is full as shown above.
- Check to be sure collection count is "0000" as shown above. If collection count is "0000", proceed to step 7. If collection count is not "0000", proceed through the following steps to clear the counts.
- From the main screen select "3. Utilities", then "3. Clear Records", then "1. All", and then "1. Yes". You will then be returned to the main menu.
- Connect the power cable to the cradle and plug into a power supply.
- Open Google Chrome and go to the following link to download the necessary drivers.
• http://www.silabs.com/Support%20Documents/Software/CP210x_VCP_Windows.zip - Please click the button named “Save As” in the below window.

- In the Windows Explorer Window, first click on the “Downloads” entry under "Favorites" and then click “Save”.

- Once the download has completed, click the button named “Open folder” as shown below.

- Once you are in your “Downloads” folder, right click on the file named “CP210x_VCP_Windows” and click “Extract All…”.

- Make sure that the option for “Show extracted files when complete” is checked and then click “Extract”.

- Once it has finished extracting the files, double click the folder named “CP210x_VCP_Windows”.

- If your version of Windows is 64 bit, please right click the file named “CP210xVCPInstaller_x64” and then click “Run as administrator”.

- If your version of Windows is 32 bit, please right click the file named “CP210xVCPInstaller_x86” and then click “Run as administrator”.

- Click “Yes” when prompted as shown below.

- Click “Next”.

- First click the radio button named “I accept this agreement” and then click “Next”.

- Once the driver installation has completed, click “Finish”.

- Connect the serial to USB cable by connecting the serial end to the cradle and the USB end to an open USB port on the computer. You may see a window pop up saying “Installing device driver software”. Another window will pop up saying that the drivers installed correctly.
- On your physical inventory collection scanner device, select option "1- Run program". Scan one or two items for testing purposes only. Enter quantity, click the enter button to return.
- Right click “My Computer” and click “Manage”.

- Click “Device Manager”.

- Double click “Ports (COM & LPT)”.

- Double click “Silicon Labs CP210x USB to UART Bridge (COMX)” and note the virtual COM port here _______.

- Click on the tab named “Port Settings”.

- Click on the drop down box named “Bits per second” and then click “115200”.

- Click “OK”.

- Close "Computer Management" by clicking the "X" in the upper right hand corner of the application window.

- Take the scanner and go out to the main menu by pressing the “ESC” button until you are presented with three options.
- Press "3" for "Utilities".
- Press "5" for "Settings".
- Press "4" for "Transmit Speed"
- Press "1" for "115200 bps".
- Press "Enter" to confirm the setting.
- Go to the main menu by pressing the "ESC" button until you are presented with three options.
- Press "2" for "Send Data".
- Insert the physical inventory scanner into the cradle.
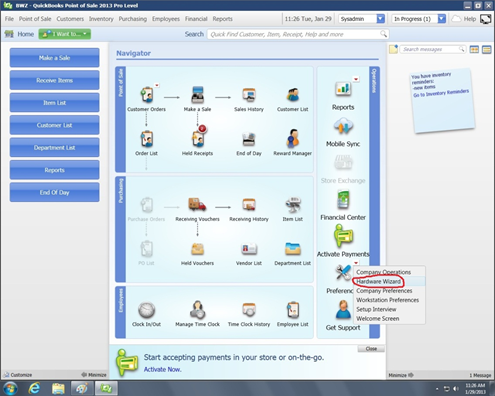
- Open your QBPOS software and go to "File", then "Preferences", and then "Hardware Wizard".
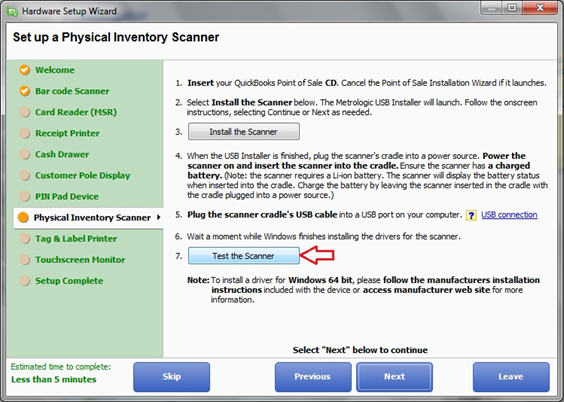
- Select "Physical Inventory Scanner", then choose the appropriate physical inventory scanner type from the two options listed, and then click “Next”.

- Click “Test the scanner”.
- Click “Begin Test”.

- You will see a "Test Successful" message and click "Close".
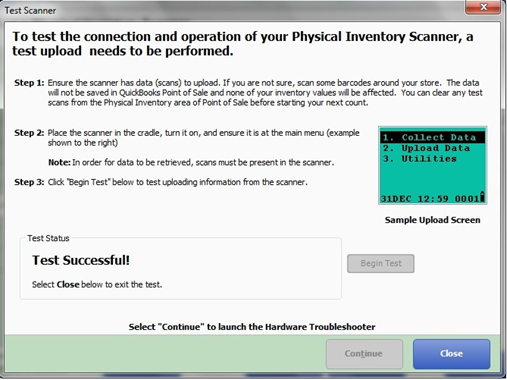
- You may get a message stating “Physical Inventory Scanner Not Detected”. If you do, please click “OK”. This message can be ignored as the inventory scanner is installed properly.

- Click "Leave" to exit the Hardware Setup Wizard.

CONGRATULATIONS, YOU HAVE NOW SUCCESSFULLY
INSTALLED YOUR PHYSICAL INVENTORY SCANNER!
Comments
0 comments
Article is closed for comments.